Free · Self-paced
02Module 2

Trigger Images & Digital Layers

The anchor your whole experience is built on, and the layers you build on top of it.

2.1 Understanding the trigger image

The trigger image is the most important element of any Artivive project. It is what the app or WebAR recognizes when a viewer scans it, and it determines how reliably the AR experience will activate.

Think of the trigger image as an anchor. The app does not search for objects or faces — it looks for a very specific visual pattern. When it finds a match, it overlays the connected digital content precisely aligned to that image.

Your trigger image can be:

  • A digital artwork you plan to print
  • A photograph of a physical painting, mural, or sculpture
  • A product label, book cover, poster, or magazine spread
  • Any image with enough visual complexity to be uniquely identified

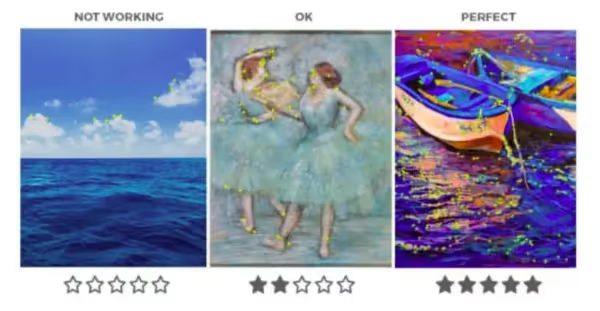
When you upload a trigger image to the editor, the system analyses it and gives it a trackability rating between 0 and 5 stars. This rating reflects how reliably the app will recognise the image in real-world conditions. A 4 or 5-star image will scan consistently and quickly. A 1 or 2 star image may scan slowly or inconsistently. A 0 star image may not scan at all.
Adding your trigger image — the anchor the app learns to recognise.

One critical rule: never use a QR code as your trigger image. If your printed piece includes an Artivive QR code for WebAR, upload a version of the image to the editor where the QR code area is covered or removed. The QR code should exist separately from the trigger image.
2.2 Optimising image recognition

Since the trackability rating directly affects your viewer's experience, it is worth understanding what drives it — and how to improve it when you get a low score.

What leads to good recognition:

  • High contrast between light and dark areas
  • Plenty of fine detail (textures, line work, intricate patterns)
  • Sharp, well-defined edges
  • Asymmetrical composition — no two quadrants of the image should look identical
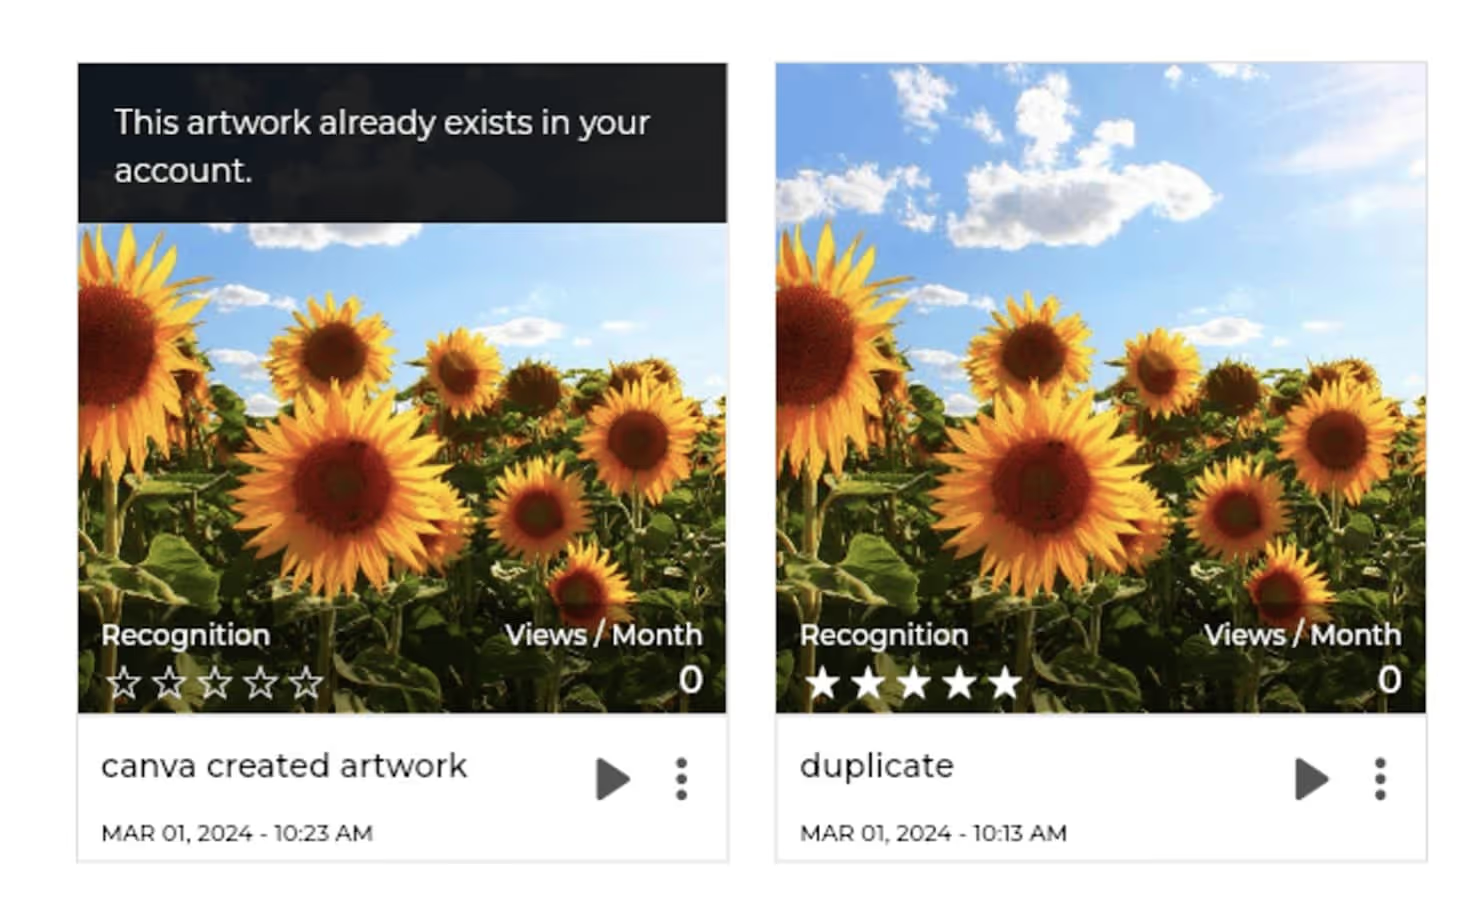
  • A unique visual "fingerprint" — details that are not found in any other image in the Artivive database

What causes poor recognition:

  • Solid or near-solid color fields
  • Very little detail (flat, geometric, or minimalist designs)
  • Blurry or out-of-focus images
  • Highly symmetrical compositions (like a mandala or a perfectly mirrored design)
  • Too much text, especially repetitive text or standardized fonts that appear across multiple artworks

A note on the star rating: The stars are a guide, not a guarantee. An image can score 5 stars but scan poorly if it shares recognizable features with something already in the Artivive database. And occasionally a 3-star image will scan reliably in practice. Always test before printing.

If your image scores low: Try increasing contrast, adding texture or detail, cropping to a more visually interesting section, or adjusting the composition slightly. In many cases, small changes make a significant difference.

2.3 Adding and positioning digital layers

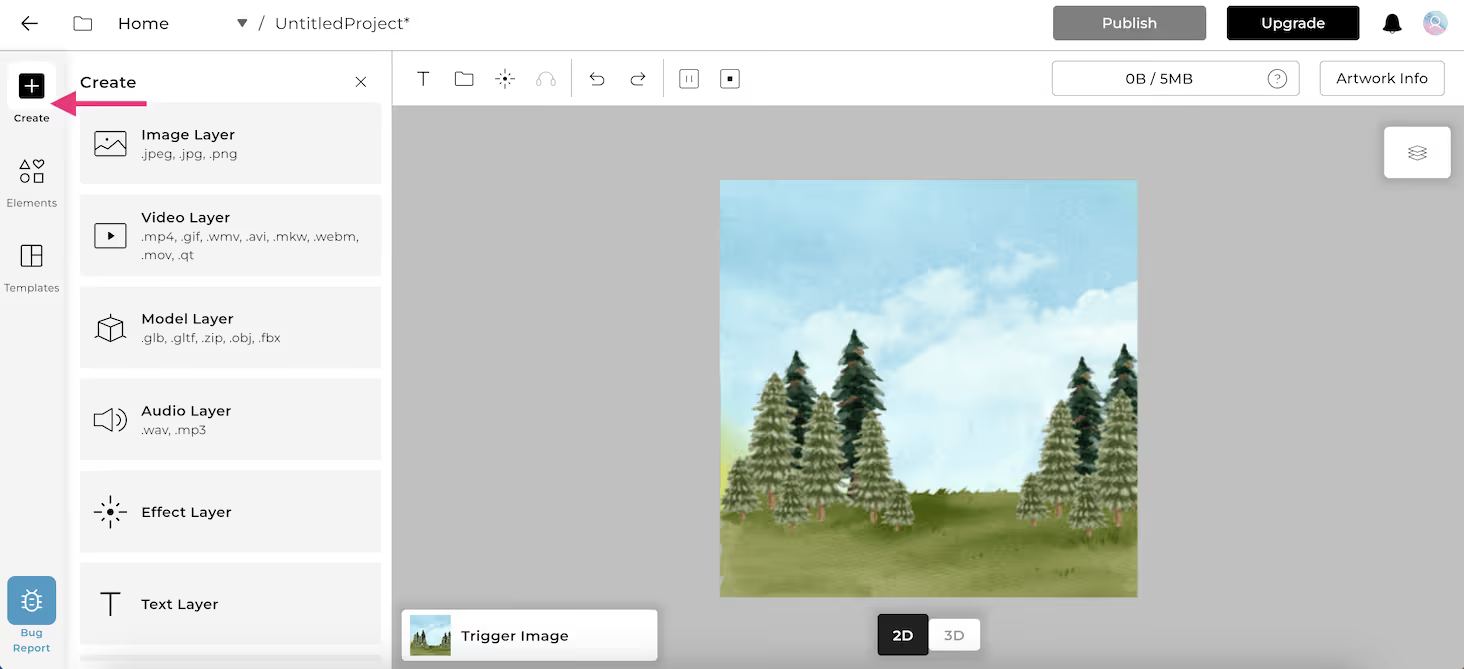
Once your trigger image is in place, the editor canvas becomes your workspace. You can now add the digital content that will appear when someone scans your artwork.

Adding layers: Click the plus button or the upload area to add your own files, or browse the elements library for pre-made assets. You can add:

  • Video files (.mp4, .gif, .mov) — for animation and motion
  • Image files (.jpg, .png) — for static overlays and graphic elements
  • Audio files — for music, narration, or sound effects
  • 3D object files (.glTF, .GLB) — for three-dimensional elements
  • Text layers — for titles, captions, or labels
  • Particle effect layers — for dynamic visual effects like sparks or smoke

Each file you add becomes a layer in your project, just like layers in a graphic design tool. Layers stack on top of each other and can be reordered.

Uploading and stacking your digital layers over the trigger image.

Positioning layers: Use the on-screen transform handles to move, rotate, and scale each layer. For precise positioning, you can also type values directly into the Transform panel on the left side of the editor.

2D vs 3D view: The editor offers both a flat 2D view and a 3D perspective view. Use 2D view for precise positioning and alignment. Switch to 3D view to see how your layers sit in space — particularly useful if you're working with 3D objects or want to position elements that should appear to float above or behind the trigger image.

Layers that sit exactly on the trigger image plane will look like they are printed on the artwork. Layers positioned slightly above it in 3D space will appear to float. This depth dimension is one of the things that makes AR distinctly different from a simple video overlay.

Switching between 2D and 3D view

2.4 Publishing and previewing your artwork

When your layers are in place and you are satisfied with the composition, it is time to publish.

Before you publish: Use Preview Mode, accessible via the button at the bottom center of the editor. Preview Mode simulates what a viewer will see when they scan your artwork in the real world. You can play through the experience, check timing, and verify that everything looks right. This is especially important if you are using Timeline animations or Sequences — both are interactive and require testing before you share.

If something looks wrong in Preview Mode, fix it in the editor and preview again. Do not skip this step.

Publishing: Click the Publish button, give your artwork a name, and confirm. The Artivive Editor will process your project — analyzing the trigger image, compressing assets, and preparing the experience for live delivery. This usually takes a minute or two depending on file sizes.

Once processing is complete, your artwork appears in your collection and is live. Anyone who scans the trigger image with the Artivive app will see your AR experience immediately.

Updating a published artwork: You can edit and republish at any time. Open the artwork's options menu (three dots), select Edit Artwork, make your changes, and publish again. If you are using WebAR, the QR code does not change — viewers who already have the link or code will automatically see the updated version next time they scan.

2.5 Viewing your AR experience

There are two ways to view an Artivive AR experience, and each has a different use case.

The Artivive App (iOS and Android): Download the free app from the App Store or Google Play. Open it and point your camera at the trigger image. No login is required to view artworks — the app is free and public. When you log in with your Artivive account, you get access to editing capabilities and AR Mode (covered in Module 3).

The app works with all published Artivive artworks, from anyone's account. It is the most reliable way to view, with the fullest feature support.

WebAR (browser-based): If you have published an artwork via WebAR (Pro Plus feature), viewers can scan a QR code with their device camera and the experience opens directly in their mobile browser — no app download required. This has significant benefits for exhibitions, events, and contexts where you cannot guarantee visitors will install an app.

WebAR has some limitations compared to the full app. In particular, Timeline animations are not currently supported in WebAR. If your artwork uses timeline animations, viewers will need the app. If your artwork uses static layers, images, video, and audio without timeline animation, WebAR works well.

Recording: Inside the Artivive app, tap the red record button to capture a video of the AR experience. The recording saves to your camera roll and can be shared directly to social media — a useful feature for promoting your work.

Finished Module 2? Hit Complete & continue below to mark it done and move on.

Module 2 complete. Nice work — on to Module 3 whenever you are ready.