Free · Self-paced
01Module 1

Foundations

What Artivive is, how it works, and how to get set up.

1.1 What is Artivive and how does it work?

Artivive is a platform that lets artists, designers, educators, and businesses add a digital layer to physical images. When someone points their phone camera at a physical artwork, poster, mural, or printed piece, the Artivive app or its browser-based WebAR technology recognises the image and displays a connected digital experience on top of it in real time.

The underlying technology relies on image recognition. When you upload an image to Artivive's creator tool, the system analyses it and maps its unique visual pattern — like a fingerprint. From that point on, any time a viewer scans that same image, the system matches it to your account and activates the digital content you have attached to it.

That digital content can be almost anything: a looping video animation, a 3D object rotating in space, layered audio, particle effects, interactive buttons, or complex multi-state experiences that respond to taps. The content appears overlaid on the physical artwork through the camera view, blending the physical and digital in real time.

Why this matters for creators: Artivive removes the technical barrier between a static physical work and a rich digital experience. You do not need to write code, work with a developer, or export to a game engine. Everything is handled inside one web-based editor.

Key vocabulary:

  • Trigger image — the physical image that activates the AR experience
  • Digital layer — any file (video, image, audio, 3D object) attached to the trigger
  • AR experience/artwork — the full interactive overlay seen through the camera
  • Artivive Editor — Artivive's creator tool, accessed via web browser or app
1.2 Creating your account

Go to bridge.artivive.com and sign up for a free Creator Account. You can register using your email address or via a social login with Google, Apple, Facebook, or Clever — whichever you prefer.

The Artivive registration page
The registration page — sign up with email or a social login.

If you register by email, check your inbox immediately for a confirmation message and click the activation link. Your account will not work until it is activated. If the email doesn't appear within a few minutes, check your spam folder before contacting support.

Once activated, log in at bridge.artivive.com to access the Artivive Editor. This is where all creation happens.

What the free account includes:

  • Full access to the Artivive editor
  • The ability to create and publish unlimited AR artworks
  • 50 lifetime views — meaning your artworks can be scanned a combined total of 50 times before you need to upgrade

The free account is designed for testing and learning. Experiment with the editor, and understand the platform before committing to a paid plan.

Practical note: The 50 views are shared across all artworks you create, not 50 per artwork. If you publish three artworks and each gets scanned 20 times, you will have used all 60 views — but since the limit is 50, the 10 scans beyond that won't register. Plan your testing accordingly.

1.3 Choosing the right plan

Artivive uses a freemium model. The free tier is real and functional — not a crippled trial — but it does have limits in both view count and available features.

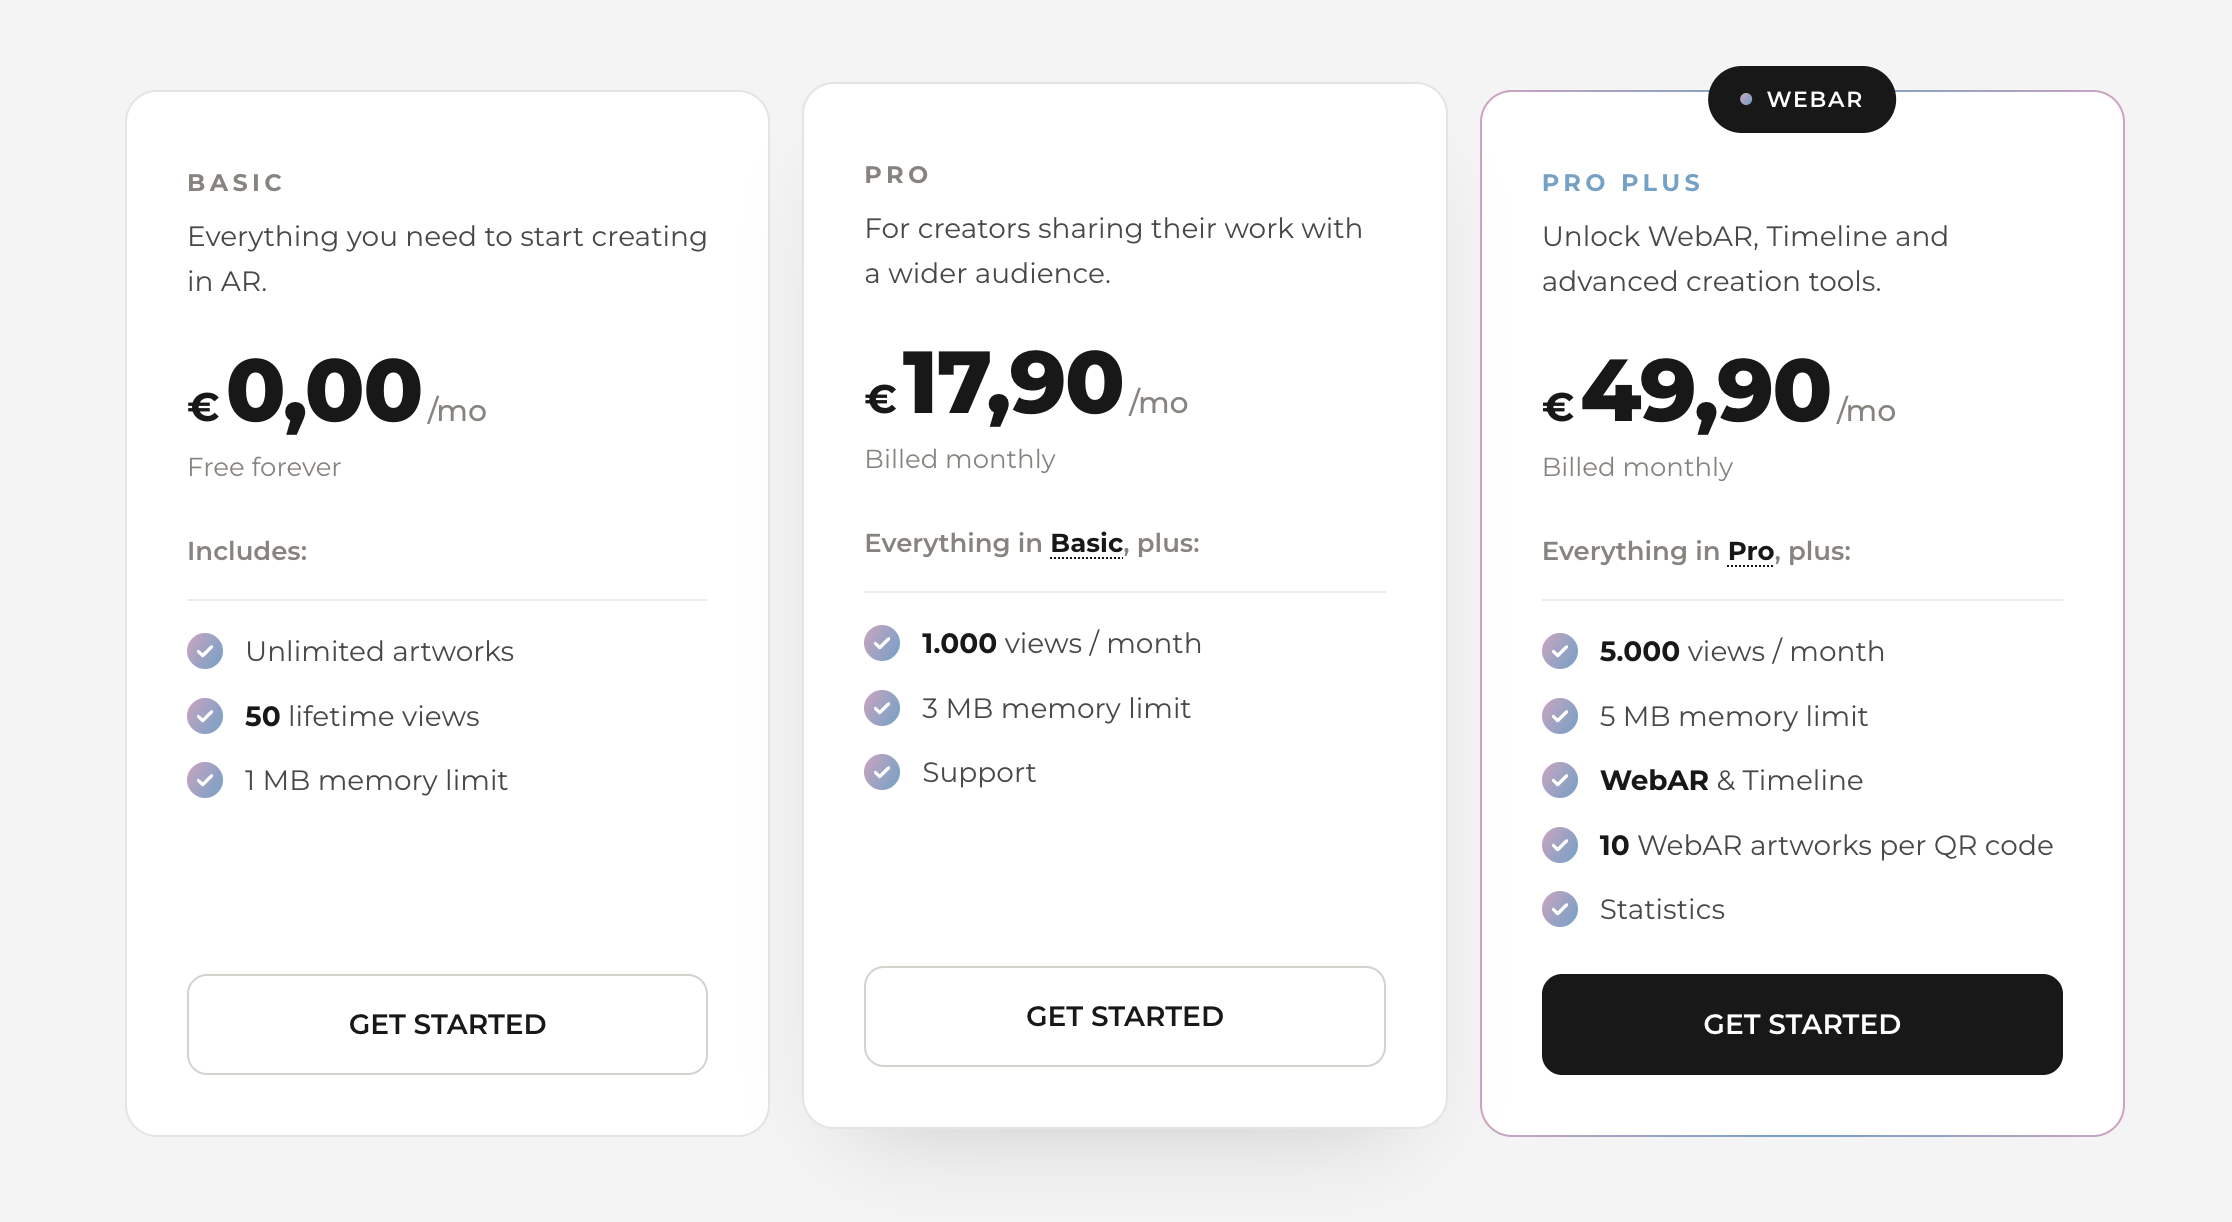
The plans at a glance:

Free gives you 50 lifetime views and access to the core editor. You can upload images, add video and image layers, publish, and test your work. This is where everyone starts.

Pro gives you 1,000 views per month, unlocking the ability to share your work publicly in a meaningful way. All core editing features remain available.

Pro Plus gives you 5,000 views per month and also unlocks two major advanced features: Timeline (animation) and Sequences (interactive states). These are the most powerful creative tools in the platform, and they require Pro Plus to access. WebAR — the ability to share AR experiences via QR code without the app — is also a Pro Plus feature.

Basic, Pro and Pro Plus subscription tiers
The Basic, Pro and Pro Plus plans compared.

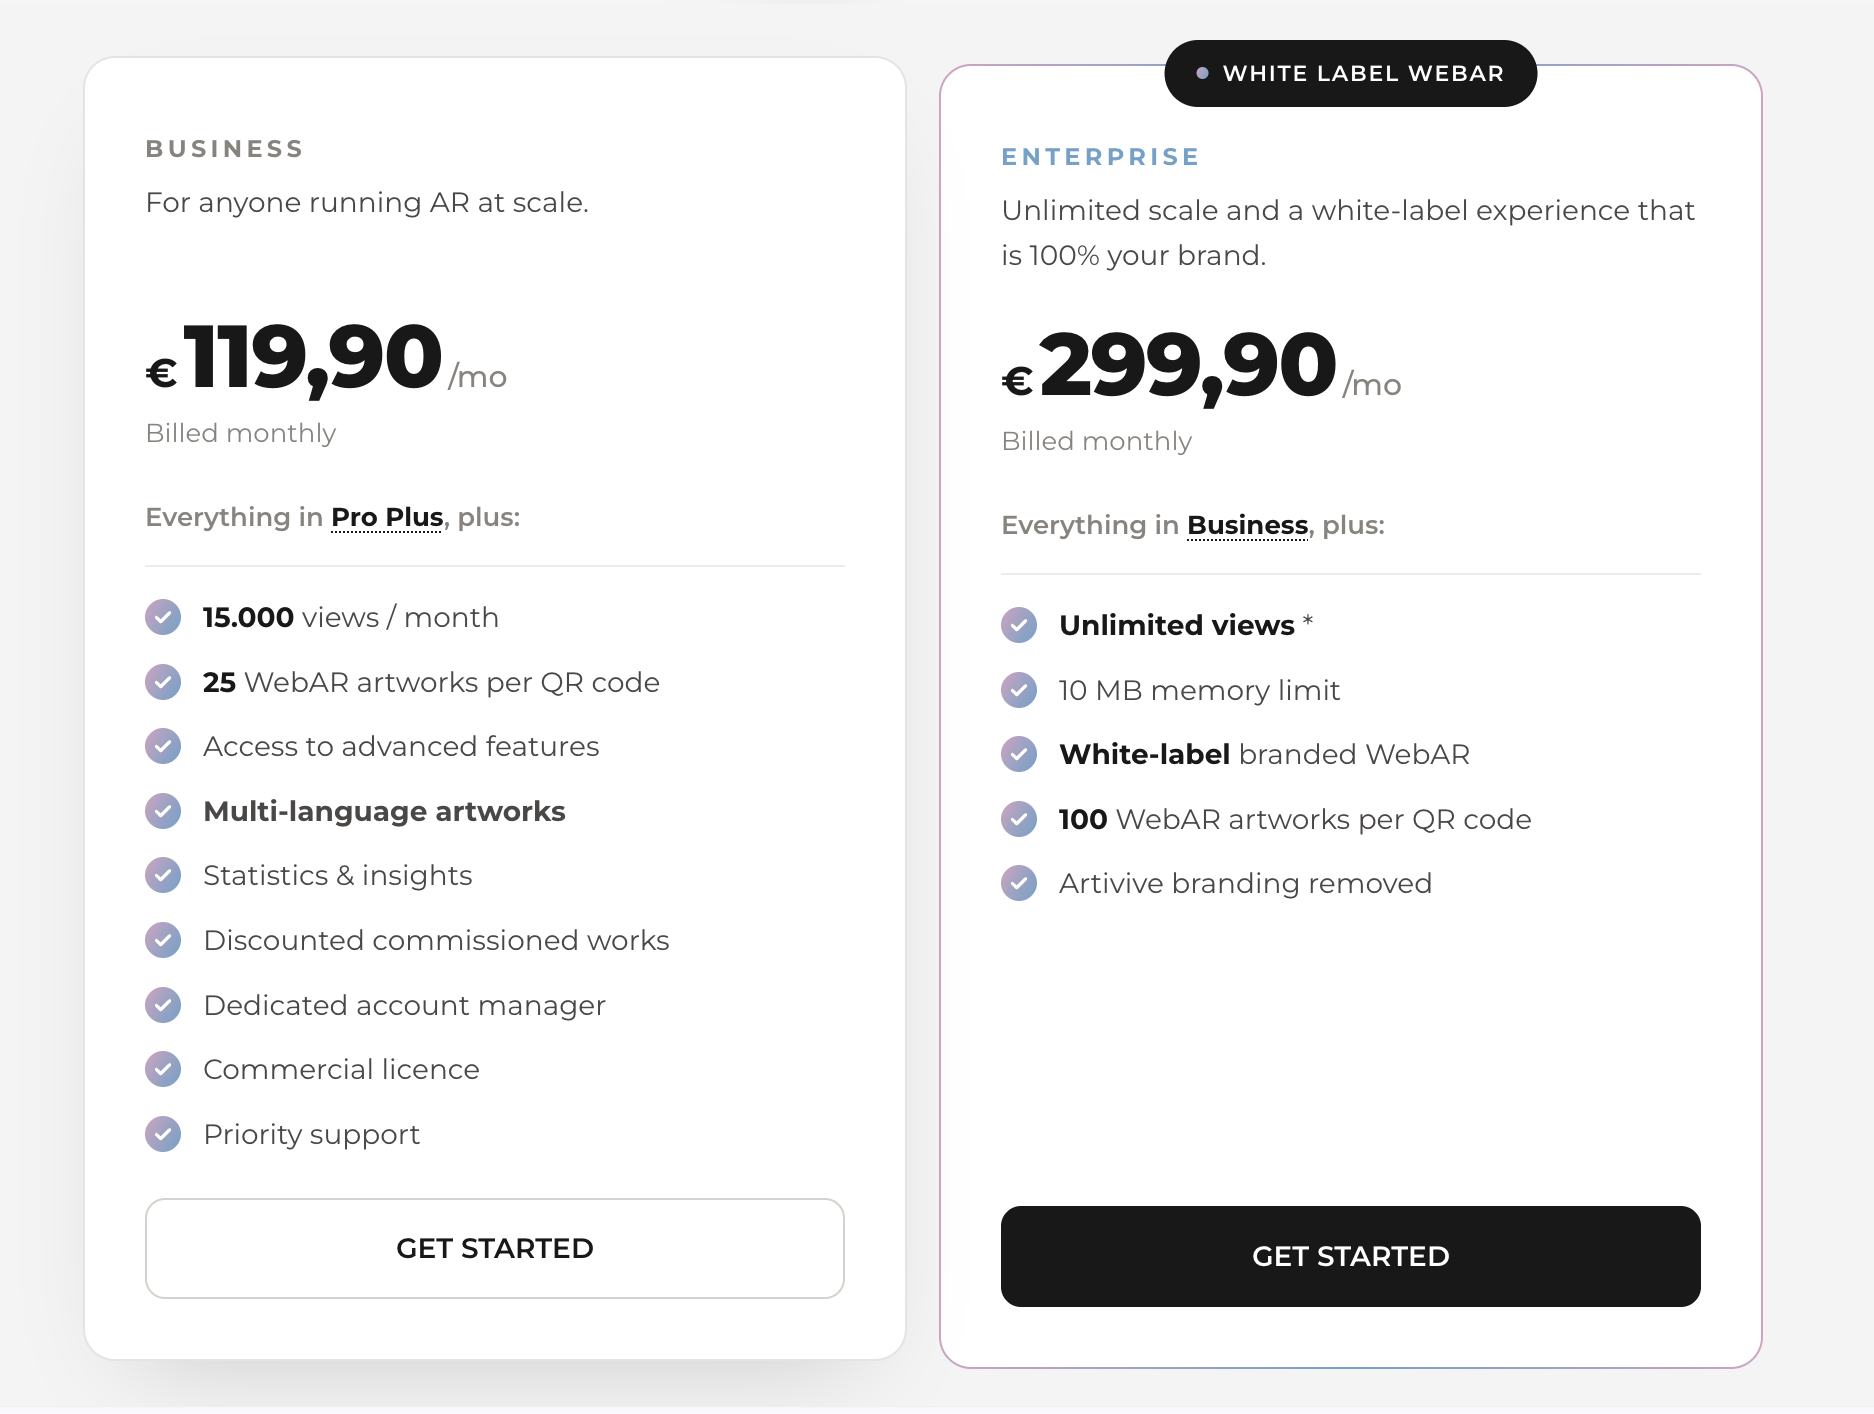
Business and Custom plans are available for high-volume needs, museums, galleries, agencies, and institutions. These are negotiated directly with Artivive.

Business and Enterprise plan tiers
The Business and Enterprise tiers for teams and institutions.

Choosing annual billing saves more than 35% compared to monthly pricing on any paid plan, and subscriptions can be changed or cancelled at any time, so you are not locked in.

1.4 Understanding the Artivive Editor

Artivive Editor is your creative workspace. Everything you build in Artivive starts and ends here. When you log in, you will see your artwork collection — a dashboard showing all the AR projects in your account.

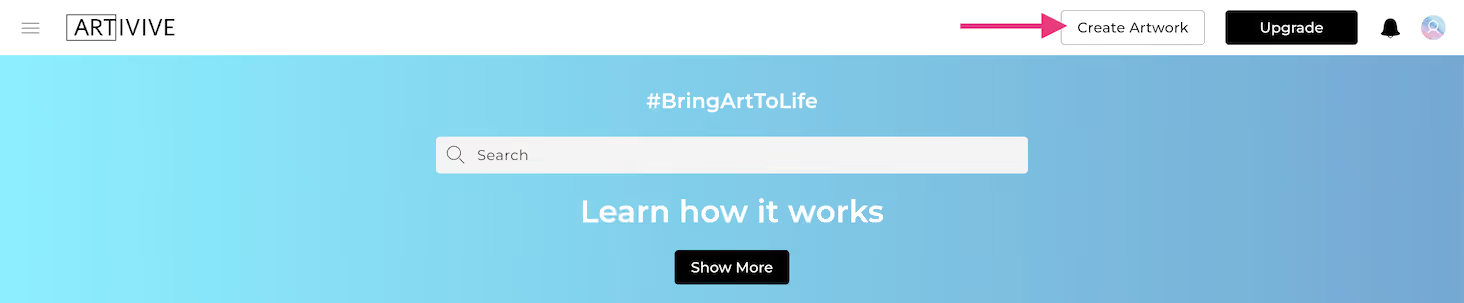
To create a new artwork, click the "Create Artwork" button in the top right corner. This opens the editor, where you will do four main things:

Create Artwork screen
Starting a new project from the "Create Artwork" screen.

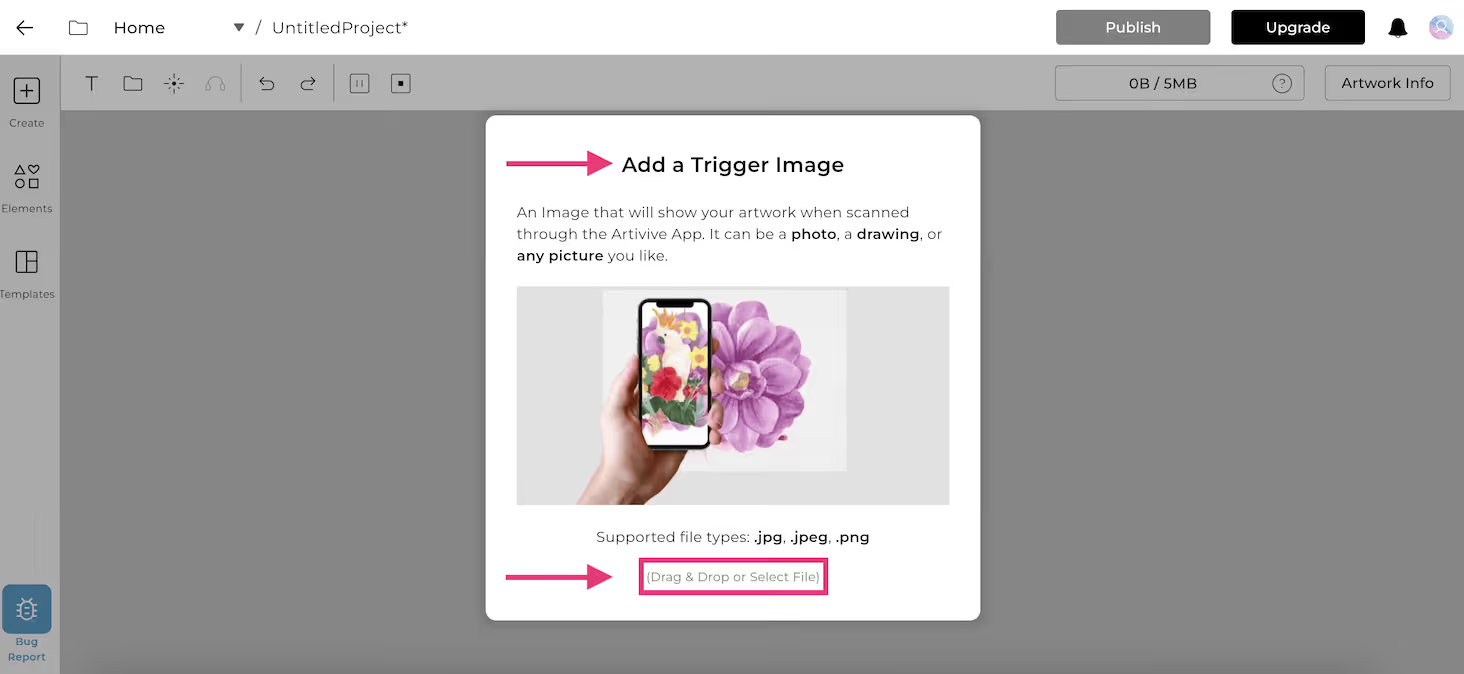
Upload a trigger image. This is the image Artivive will learn to recognize. It becomes the anchor for your entire experience.

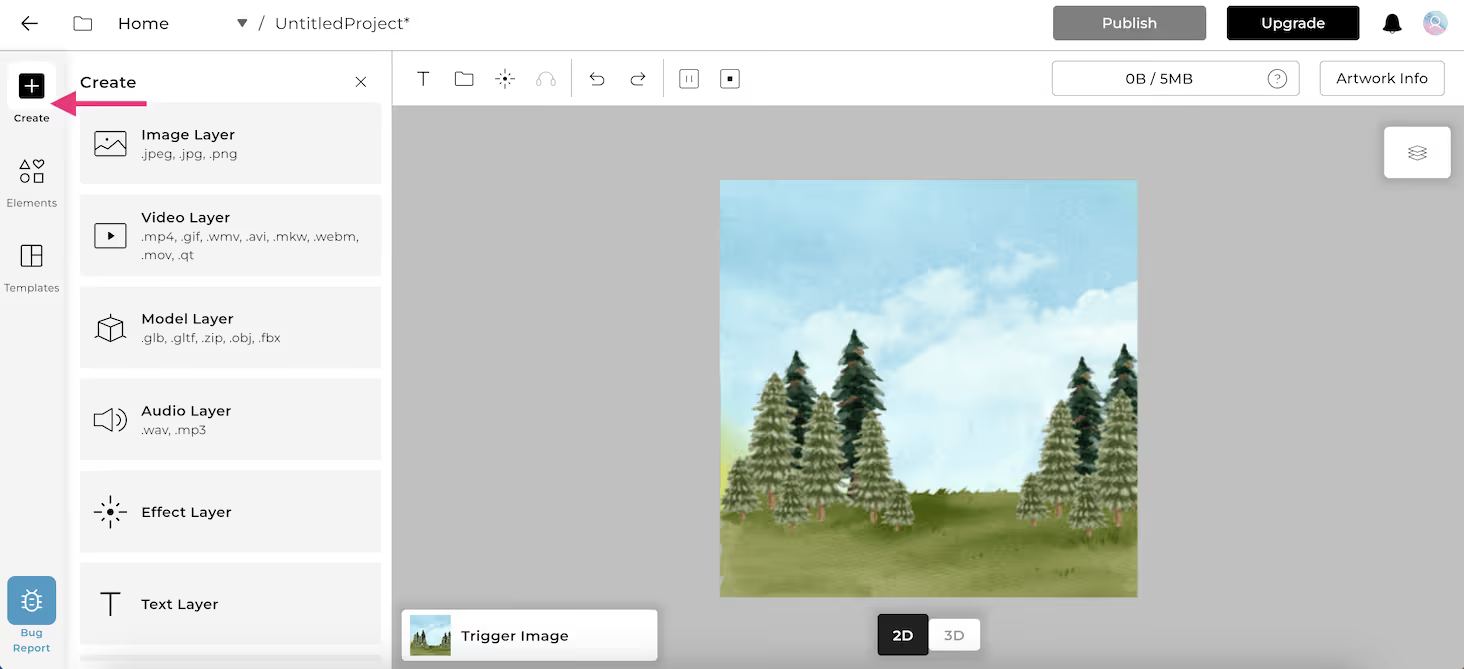
Add and arrange digital layers. You can upload your own files — video, images, audio, 3D objects — or browse the built-in elements library and pre-made templates. Layers stack on top of each other and can be moved, rotated, and scaled in both 2D and 3D view.

Animate and configure. With a Pro Plus account, you can open the Timeline to animate layers. You can also add interactions, sound settings, particle effects, and more.

Opening the Timeline to animate your layers.

Publish and preview. Before going live, Preview Mode lets you test your experience in the editor. Once you're happy, hit Publish. After processing, your artwork is live and scannable.

Publishing an artwork
Publishing your artwork once you're happy with the preview.

The editor interface is browser-based, so there is nothing to install. It works on any modern desktop browser. For editing on mobile, Artivive also offers a dedicated app with its own editing capabilities, covered in Module 2.

Finished Module 1? Hit Complete & continue below to mark it done and move on.

Module 1 complete. Nice work — on to Module 2 whenever you are ready.